Need a simple and cheap web server? The Pi Zero W combined with a few simple parts can provide just that.
Parts List:
Step 1:
Assemble the USB-A Add-on Board using the instructions provided. It is pretty self explanatory.
Step 2:
Use Etcher to flash Raspbian Lite to the SD card.
Step 3:
After flashing the SD card eject and re-insert into your computer to re-mount.
Step 4:
- Open the
bootdirectory.- Create an empty file named
ssh. - Create a file named
wpa_supplicant.conf
- Create an empty file named
- Open the
wpa_supplicant.conffile in the text editor of your choice and enter the following. Modify with your WiFi creds.
country=US
ctrl_interface=DIR=/var/run/wpa_supplicant GROUP=netdev
update_config=1

network={
ssid="Network-Name"
scan_ssid=1
psk="password"
key_mgmt=WPA-PSK
}
Step 5:
Unmount the SD card and insert it into the Pi Zero.
Step 6:
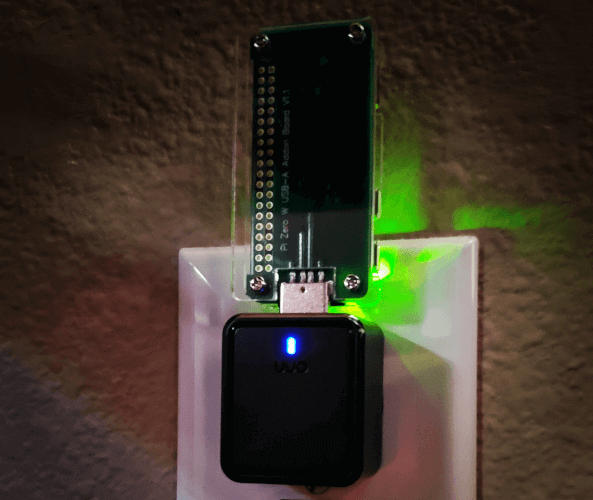
Plug the Pi Zero into the charger.
Step 7:
Plug the charger into a wall outlet.
Once the Pi Zero boots it should connect to your WiFi that you previously configured. Now you should be able to SSH into the Pi Zero using the default Raspberry Pi password (raspberry).
ssh pi@raspberrypiNow you can install the web server of your choice. If you would like to get a web server up and running fast with the Bludit flat file CMS installed automatically use the command below after SSHing into the Pi Zero.
curl -sSL https://pilab.dev/install-bluditpi | bashThis command will setup Apache/PHP and install the latest version of Bludit. Once this process is complete you can access your site by visiting http://raspberrypi in your web browser. Just follow the prompts to setup Bludit.
If you are concerned about running a command like this without knowing what it is doing just check it out before running it by opening https://pilab.dev/install-bluditpi in your web browser.
Now you should have a fully functional web server that you can use for a personal website or blog. If you decide to open up your network to allow the site to be accessible from outside your network I highly recommend that you use Fail2ban to protect your network.
Updates:
I have updated the instructions in this post to use the Onn Universal Wall Charger which provides my originally intended configuration.
I have added a Gosund Smart Plug to my setup so I can easily restart the server in the event that it crashes and I can't SSH into it to reboot.