When I first put Pi Lab together I used various SD cards I could find laying around. They were a combination fo 8GB and 16GB class 4 cards.
I recently upgraded all 4 cards to Samsung EVO Plus 32GB SD Cards. I found a good deal for a 5 pack on Amazon and started the process of prepping. Here is the basic steps that I took. This is not a full "how-to". It is meant to be general guidance. If you decide to use any of the commands or steps please be very careful since you could mess up and modify the wrong partition or device.
The first issue that I had was the fact that I had setup each card using Noobs. This meant that after I cloned the SD cards I couldn't simply use "raspi config" to expand the file system since that is not supported on Noobs.
So after some research this is the method that I used.
Note: I used Linux for this process.
Step 1:
First I shutdown the Pi that I planned to upgrade via SSH.
sudo shutdown nowAfter shutting down the Pi I unplugged the Pi and removed the SD card. I then put it into an adapter so that I could insert it into my laptop. If your laptop doesn't have an SD card slot you would need to use an SD card reader.
Since my laptop auto mounts SD cards I unmounted the partitions before proceeding.
I then ran the following command to create an image of the SD card.
dd if=/dev/mmcblk0 of=~/pi.img bs=4M status=progressThe following command can help locate the correct device for your SD card.
lsblkStep 2:
Next I removed the SD card and inserted the new larger SD card.
I then ran the following command to copy the image to the new SD card.
dd if=~/pi.img of=/dev/mmcblk0 bs=4M conv=fsync status=progressOnce this was done I had a working bootable SD card cloned from the original. However, the file system still needed to be expanded to take full advantage of the card.
Step 3:
Finally I used Gparted to resize partitions on the SD card to fully expand the file system.
Here are the basic steps.
Select partition labeled SETTINGS – Right Click- Resize/Move, At Resize/Move – Drag the Bar from Left to Right – Click Resize/Move.
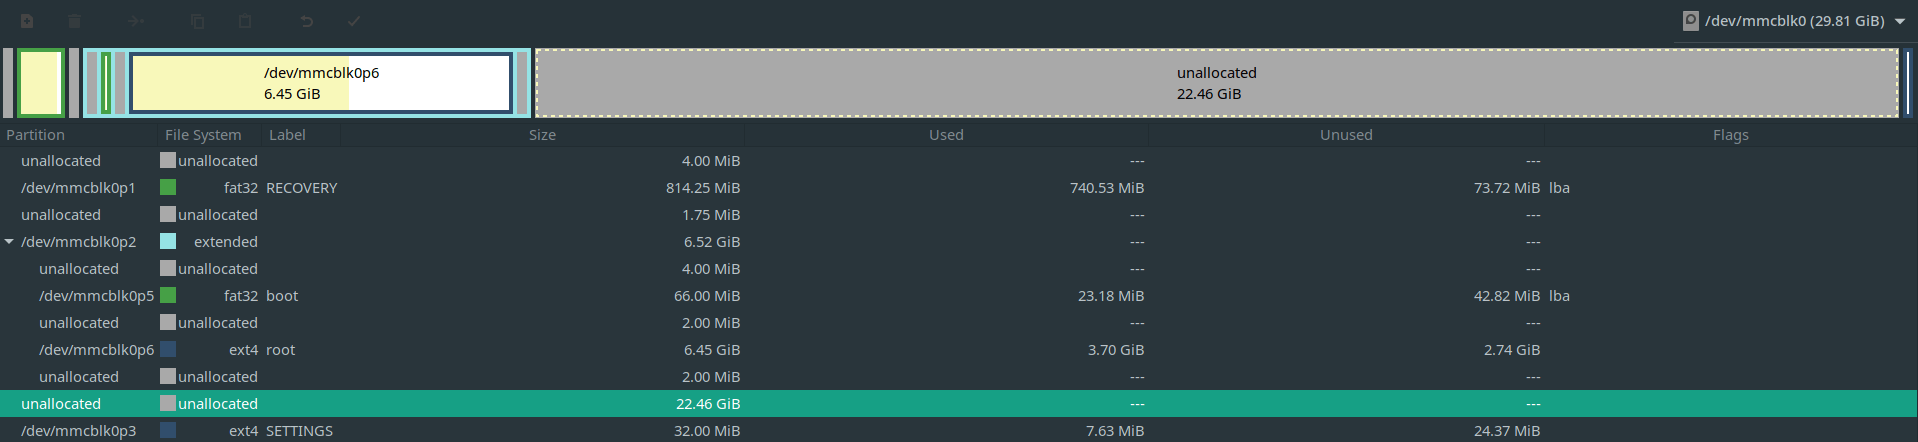
Select extended File System (Cyan Color) – Click Resize/Move, At Resize/Move – Expand the Bar From Left to Right – Click Resize/Move.
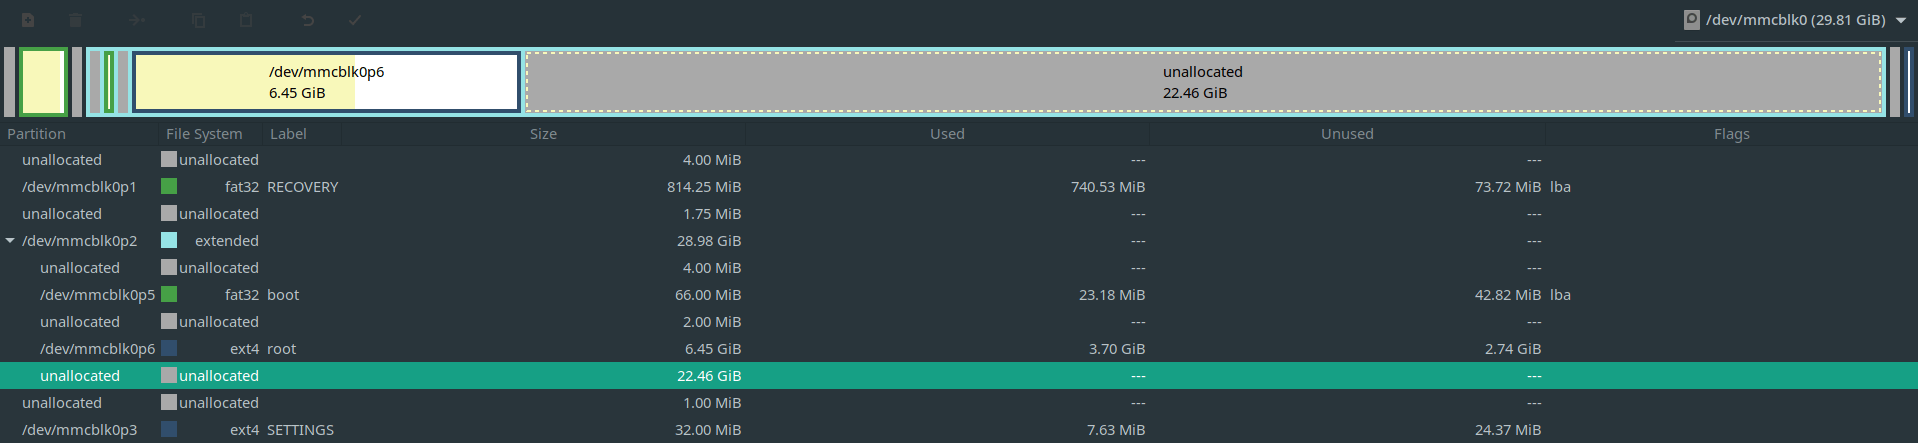
Select partition labeled root – Right Click – Resize/Move, At Resize/Move – Expand the Bar From Left to Right – Click Resize/Move.
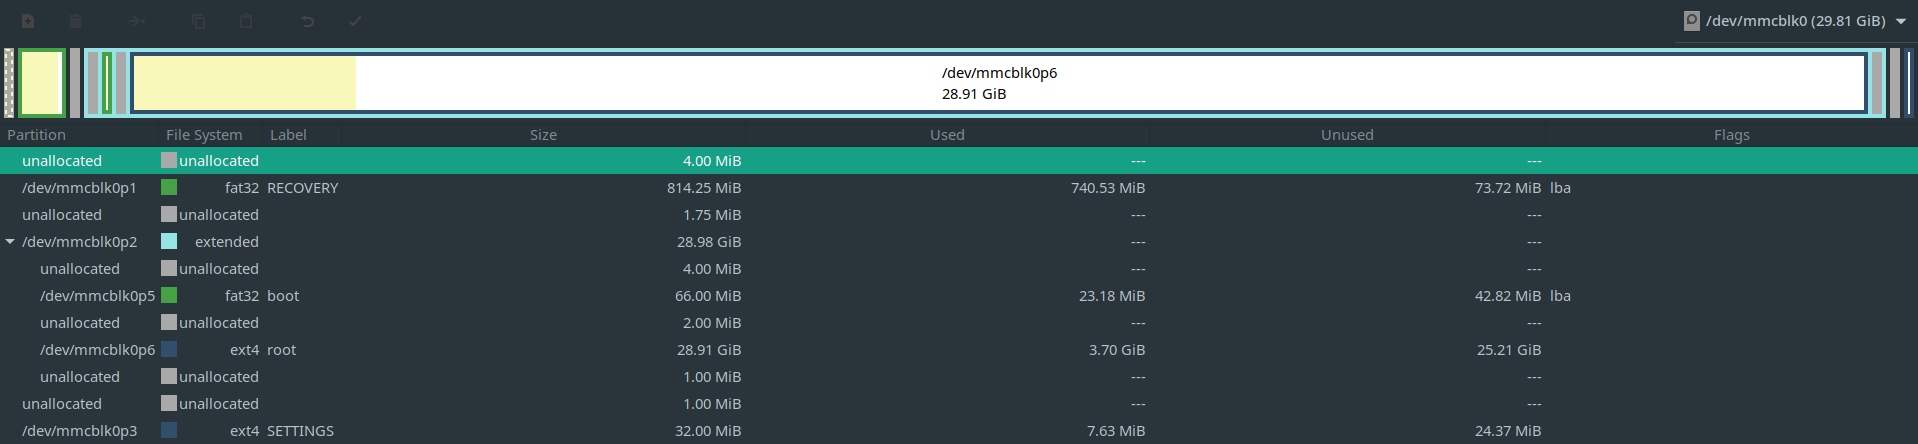
Select parition labeled SETTINGS – Right Click – Resize/Move, At Resize/Move – Expand the Bar from Right to Left – Click Resize/Move.
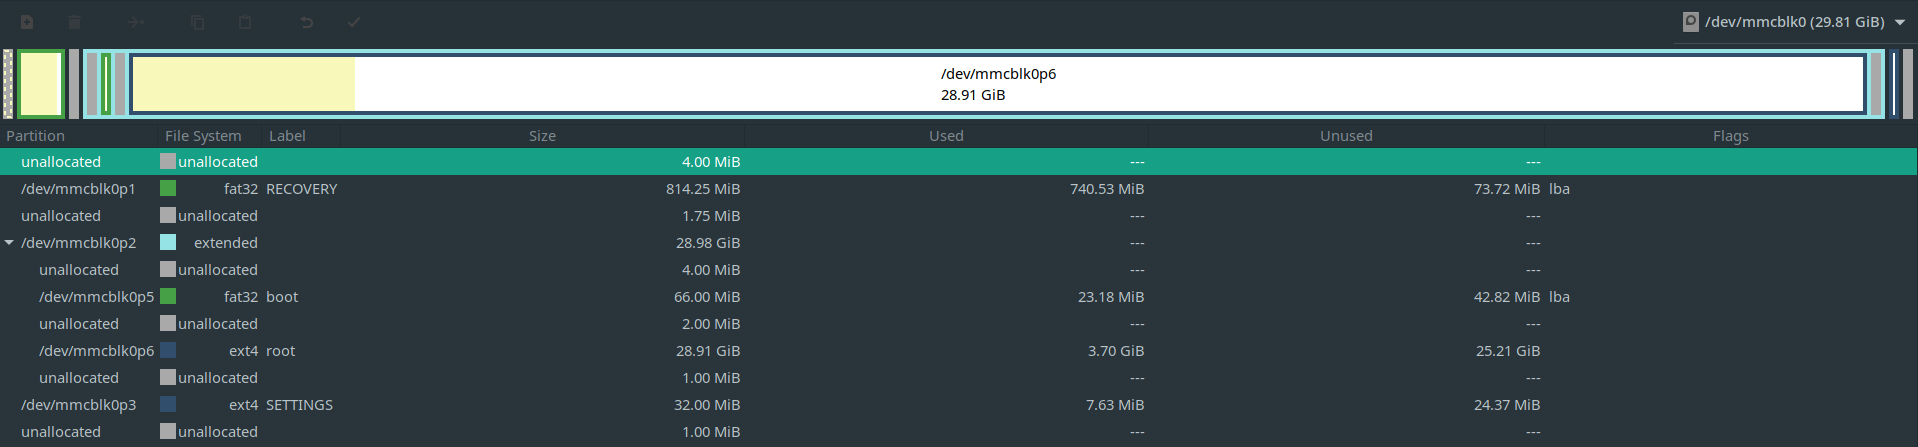
Click Apply All Operations at taskbar to Apply the changes.
I then repeated this process for each card. Since Pi Lab is setup behind a load balancer the Pi Lab site remained online while upgrading each web node's SD card. When it was time to upgrade the load balancer's SD card I simply had to change the port forward on my network to route port 80 and 443 to one of the nodes that had already been completed. This way Pi Lab never had to go offline.